Toilets are essential in every home, so when yours starts having issues, it can be a real hassle. If you’re considering replacing your toilet, we’ve got your back.
In this blog, we’ll guide you through everything you need to know about replacing a toilet, from spotting the signs that it’s time for a new one to the tools you’ll need and the steps to get the job done.
Is It Time to Replace Your Toilet?
Let’s be real: a faulty toilet is not something you want to deal with for long. The thing is, toilets can last anywhere from 10 to 30 years, depending on usage and maintenance. However, certain signs indicate it might be time for a toilet replacement:
- Cracks in the porcelain: Even small cracks can lead to leaks. If you notice any, it’s time to think about replacing the toilet.
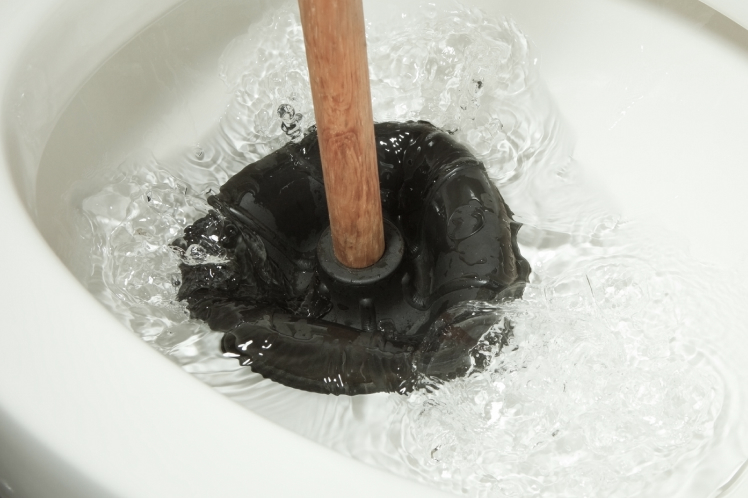
- Frequent clogs: While a plunger can help in some cases, if your toilet is constantly clogged despite regular cleaning and maintenance, it might be due for replacement.
- Water pooling around the base: If you notice water pooling around the base, this could signal a problem with the wax ring or seal, something that requires a full replacement.
Tips for Installing a Toilet in Australia
- Measure your space: Ensure the new toilet fits the available space. Measure from the wall to the centre of the floor flange to determine the correct rough-in size.
- Check for leaks: Once installed, always double-check for leaks around the base and the water supply connection.
- Pick the right toilet: Consider water efficiency when choosing a new toilet. Look for models with a high WELS rating (water efficiency label) to save on water usage and reduce your bills.
Preparing for the Toilet Replacement
Before diving into replacing a toilet in Australia, it’s important to ensure that you have all the right tools. Replacing a toilet isn’t an overly complicated task, but you’ll need a few things to get the job done properly:
- New toilet (make sure to choose one that fits the space)
- Adjustable wrench
- Screwdriver
- Wax ring (or rubber seal)
- Toilet bolts
- Silicone caulk
- Teflon tape
- Bucket and towel (for water drainage)
Step-by-Step Guide: How to Replace a Toilet
Step 1: Turn Off the Water Supply
The first thing you need to do before removing your toilet is to turn off the water supply. You can do this by locating the shutoff valve, which can be found near the base of the toilet, behind or to the side of the unit. Turn the valve clockwise until it’s fully closed, ensuring no more water will flow into the tank.
Once the water supply is turned off, flush the toilet to drain the remaining water from both the tank and the bowl. This step is important to prevent any water from spilling onto the floor during the removal process.
Step 2: Disconnect the Water Line
After the water supply is cut off, the next step is to disconnect the water line from the toilet tank. Use your adjustable wrench to loosen and remove the nut that connects the water supply line to the bottom of the toilet tank.
Make sure to have a towel or bucket ready, as there may still be some leftover water in the line that could drip out when disconnected.
Step 3: Remove the Toilet
Now it’s time to remove the toilet. Start by unscrewing the bolts that hold the toilet to the floor. These bolts are covered by plastic caps, which you’ll need to gently pop off. Once you’ve exposed the bolts, use your wrench to loosen and remove them. Once the bolts are removed, carefully lift the toilet off its base. It can be heavy, so it’s best to have extra help.
Keep in mind that some water may still be trapped in the tank or bowl, so be careful when lifting the toilet to avoid spills. Place the toilet on an old towel or rag to protect the floor from any mess.
Step 4: Clean the Floor and Inspect the Wax Ring
With the toilet removed, you can now focus on cleaning the area around the toilet flange, the hole in the floor where the toilet was attached. Use a cloth or rag to wipe away any grime, dirt, and old wax that has built up over time.
After cleaning, carefully inspect the condition of the flange and the wax ring. If the wax ring looks cracked, damaged, or compressed, it’s important to replace it. The wax ring creates a watertight seal between the toilet and the floor, so a proper seal is vital to prevent leaks.
Step 5: Install the New Wax Ring
Take your new wax ring and place it carefully over the flange. Ensure that it’s centred and sits evenly on the surface, as this will create a solid, leak-proof seal. If you’re using a rubber seal instead of a traditional wax ring, make sure it’s positioned properly in place.
Many people prefer rubber seals because they are easier to install and create less mess compared to wax rings. However, both options work well for sealing the toilet base.
Step 6: Position the New Toilet
Once the wax ring is securely in place, it’s time for the new toilet installation. Carefully lower the toilet over the flange, aligning the toilet’s holes with the bolts in the floor. This step can be tricky, as you need to ensure that the toilet is positioned precisely. Gently press the toilet downwards to compress the wax ring and create a solid seal between the toilet and the floor.
Step 7: Secure the Toilet to the Floor
After positioning the toilet correctly, it’s time to secure it. Insert the toilet bolts into the flange, through the holes in the base of the toilet, and hand-tighten them. Once both bolts are in place, use your wrench to tighten them. Be cautious not to overtighten, as doing so could crack the porcelain. Tighten each bolt evenly until the toilet feels firm and stable.
Step 8: Reconnect the Water Line
After securing the toilet to the floor, you can reconnect the water supply line. Use your adjustable wrench to connect the water line back to the bottom of the toilet tank. For a leak-proof connection, wrap Teflon tape around the threaded ends of the pipe before tightening. This step ensures that there’s no risk of leakage at the connection point.
Step 9: Test for Leaks
With everything connected and secured, it’s time to test the installation. Turn the water supply back on and let the toilet tank fill. Once filled, flush the toilet to check for any leaks around the base or the water supply line. If you see any leaks, turn off the water and tighten the connections or recheck the wax ring.
Step 10: Finish the Installation
Once you’ve confirmed that there are no leaks and everything is functioning properly, you can apply silicone caulk around the base of the toilet. This step can help to secure the toilet further and create a clean finish. The caulk prevents water from seeping underneath the toilet and keeps the floor area clean. Smooth the caulk with your finger or a caulk smoothing tool for a neat, professional appearance.
Conclusion
Replacing a toilet in Australia can be a straightforward process if you have the right tools and a solid understanding of what’s involved.
Take your time, follow the steps above, and don’t hesitate to call a professional if needed. If you need assistance with installing or replacing a toilet, feel free to reach out to our team of plumbers in Sydney at 24 Hour Trade Services. Call us at 1300 229 897 or submit our online form. We’re here to help with all your plumbing needs!